In recent years, diamond painting has gained immense popularity as a captivating and relaxing craft. This art form combines the beauty of cross-stitching with the brilliance of sparkling gemstones, resulting in stunning masterpieces that can adorn any space. If you’re new to diamond painting or looking for some tips to enhance your skills, this guide is for you. In this article, we will explore the essential diamond painting tools and techniques, enabling you to embark on your artistic journey with confidence.
Understanding the Diamond Painting Tools
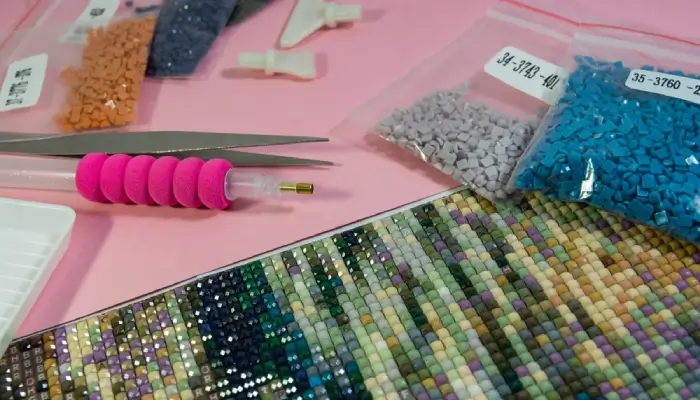
Diamond painting requires a specific set of tools to ensure a smooth and enjoyable experience. Let’s delve into the essential tools you need to get started:
1. Diamond Applicator:
The diamond applicator, a stylus or pen, is the primary tool for picking up and placing the tiny resin gems onto the canvas. These pens usually come in two varieties: a simple pen-like design or a more advanced version with a wax tip. The wax tip helps the gems adhere to the pen, allowing for easier placement on the canvas. Choose the type that feels comfortable for you and experiment with different pens to find the one that suits your preferences.
2. Diamond Tray:
The diamond tray serves as a practical companion to the diamond applicator. It is a shallow container with multiple sections that hold different diamond colors. This tool helps you organize and access the gems easily, preventing them from rolling off the table or getting mixed up. Start by pouring a small quantity of diamonds into the tray and keeping it close by as you work on your project. You can also use multiple trays if your painting involves an extensive color palette.
3. Canvas and Adhesive:
The canvas is the foundation of your diamond painting project. It is a high-quality fabric printed with a detailed design, which serves as a guide for placing the diamonds. The adhesive layer on the canvas has numbered symbols, or color codes, corresponding to the diamond colors. When selecting a canvas, ensure it is flat and has a strong adhesive to prevent the diamonds from falling off once placed. Consider choosing a design that resonates with your artistic style and preferences.
Techniques for Perfecting Your Diamond Painting
Now that you’re familiar with the essential tools, let’s explore some techniques that will elevate your diamond painting skills:
1. Start Small, Go Slow:
If you’re new to diamond painting, it’s advisable, to begin with a smaller, less intricate design. This allows you to familiarize yourself with the process and build confidence in your abilities. As you gain experience, you can gradually move on to more complex projects. Remember, patience is key. Take your time and enjoy the process, appreciating each diamond you place on the canvas.
2. Neat and Tidy:
To maintain a clean and organized workspace, consider using a craft tray or a designated area with a smooth surface. Keep your diamonds in their respective trays, and cover the adhesive sections of the canvas with a protective film or a piece of paper. This precaution prevents accidental spills and only exposes the intended area. By maintaining a neat and tidy setup, you can focus more on the artistic aspect of the craft.
3. Consistent Pressure and Placement:
When applying the diamonds to the canvas, use consistent and gentle pressure to ensure proper adhesion. Apply the diamond directly to the corresponding symbol or color code, aligning it precisely. Avoid pressing too hard, as it may distort the canvas or cause the adhesive to smear. If you accidentally place a diamond incorrectly, use a pair of tweezers or the flat side of the diamond pen to remove it carefully.
4. Storage and Preservation:
Diamond painting is a labor of love that takes time to complete. To protect your work-In in-progress, consider investing in a storage container specifically designed for diamond paintings. These containers are equipped with airtight lids, keeping your canvas, diamonds, and tools safe from dust, moisture, and damage. Additionally, if you complete a diamond painting and wish to display it, consider framing it behind glass to preserve its beauty for years to come.
Conclusion
Diamond painting is a mesmerizing craft that allows you to channel your creativity and create stunning artwork adorned with shimmering gems. By understanding the essential tools and employing the techniques discussed in this article, you can embark on your diamond painting journey with confidence and finesse. Remember, each brushstroke of diamonds brings your creation to life, making every moment spent on this craft a truly fulfilling experience. So, grab your tools, choose a captivating design, and let your imagination sparkle!

