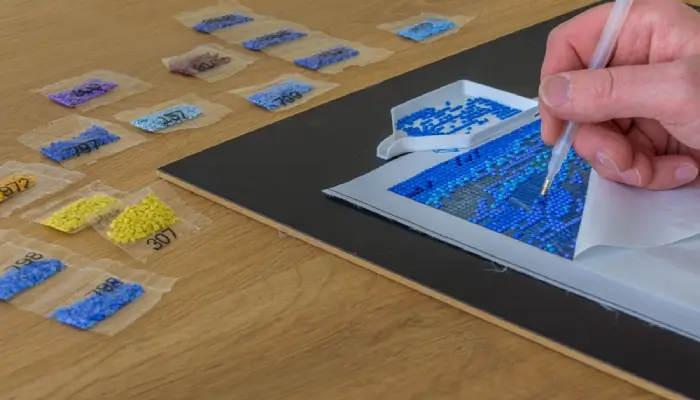
Diamond painting has become a popular craft that combines creativity and relaxation. It involves placing tiny resin diamonds onto a canvas to create stunning, sparkling artwork. One of the essential tools in diamond painting is the diamond painting pen. This article will guide you on how to use a diamond painting pen effectively, ensuring that your diamond painting experience is smooth and enjoyable. We will cover two important aspects: preparing the pen and using it to pick up and place diamonds accurately.
Preparing Your Diamond Painting Pen
Before you begin your diamond painting project, it’s crucial to prepare your diamond painting pen properly. These steps will help ensure that the pen is ready to pick up diamonds effectively.
1. Assembling the Pen:
Most diamond painting pens consist of two main components: the body and the nib. Here’s how to assemble the pen:
a. Unscrew the pen body to separate it into two pieces.
b. Take the nib and insert it into the open end of the pen body.
c. Screw the pen body back together until it is securely fastened.
2. Adjusting the Pen Grip:
The grip of the diamond painting pen plays a significant role in your comfort and control during the painting process. Follow these tips to achieve an optimal grip:
a. Hold the pen between your thumb and index finger.
b. Find a grip that feels comfortable and secure, allowing you to have a steady hand.
c. Experiment with different grips to discover what works best for you.
3. Preparing the Wax or Adhesive:
To enhance the diamond grip, many diamond painting pens require wax or adhesive. The wax or adhesive acts as a sticky surface for picking up diamonds. Here’s how to prepare it:
a. Take a small piece of wax or adhesive and roll it into a small ball using your fingers.
b. Insert the rolled wax or adhesive into the hollow end of the pen nib.
c. Gently press and twist the wax or adhesive to ensure it adheres securely to the nib.
Using the Diamond Painting Pen
Once your diamond painting pen is prepared, it’s time to start using it to pick up and place the diamonds onto the canvas. Follow these steps for accurate diamond placement.
1. Pouring and Sorting Diamonds:
Before you begin, pour out a small amount of diamonds onto a flat surface or sorting tray. This step ensures that you have easy access to the diamonds while painting. Here’s how to sort and prepare your diamonds:
a. Pour out a small quantity of diamonds from the packet onto the sorting tray.
b. Gently shake the tray or use the edge of a card to spread the diamonds evenly.
c. Use the flat side of the diamond painting pen to pick up the diamonds individually. Press the pen gently onto the diamond’s faceted surface.
2. Picking Up Diamonds:
To pick up a diamond using the diamond painting pen, follow these steps:
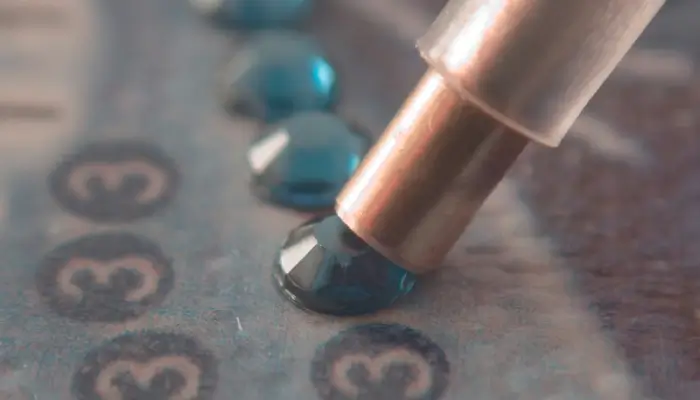
a. Press the pen’s adhesive end gently onto the top faceted surface of a diamond.
b. Lift the pen, and the diamond should stick to the wax or adhesive on the pen.
c. Check that the diamond is securely attached to the pen by giving it a gentle tap.
3. Placing Diamonds onto the Canvas:
Now that you have a diamond attached to your pen, it’s time to place it onto the canvas. Follow these steps for accurate placement:
a. Locate the corresponding symbol on the canvas where the diamond should be placed.
b. Gently press the diamond onto the canvas, aligning it with the symbol.
c. Apply slight pressure to ensure the diamond sticks to the canvas securely.
Conclusion:
Using a diamond painting pen effectively is a fundamental skill to master for any diamond painting enthusiast. By following the steps outlined in this article, you can ensure that your pen is prepared correctly and that you pick up and place diamonds accurately on the canvas. Remember to take your time, enjoy the process, and let your creativity shine through as you embark on your diamond painting journey. Happy painting!

